
Hearing Aid Wax Filters Must Match Your Device
Before buying, check the exact model, receiver generation, dome or custom mold, installed filter system and part number because each can affect compatibility.
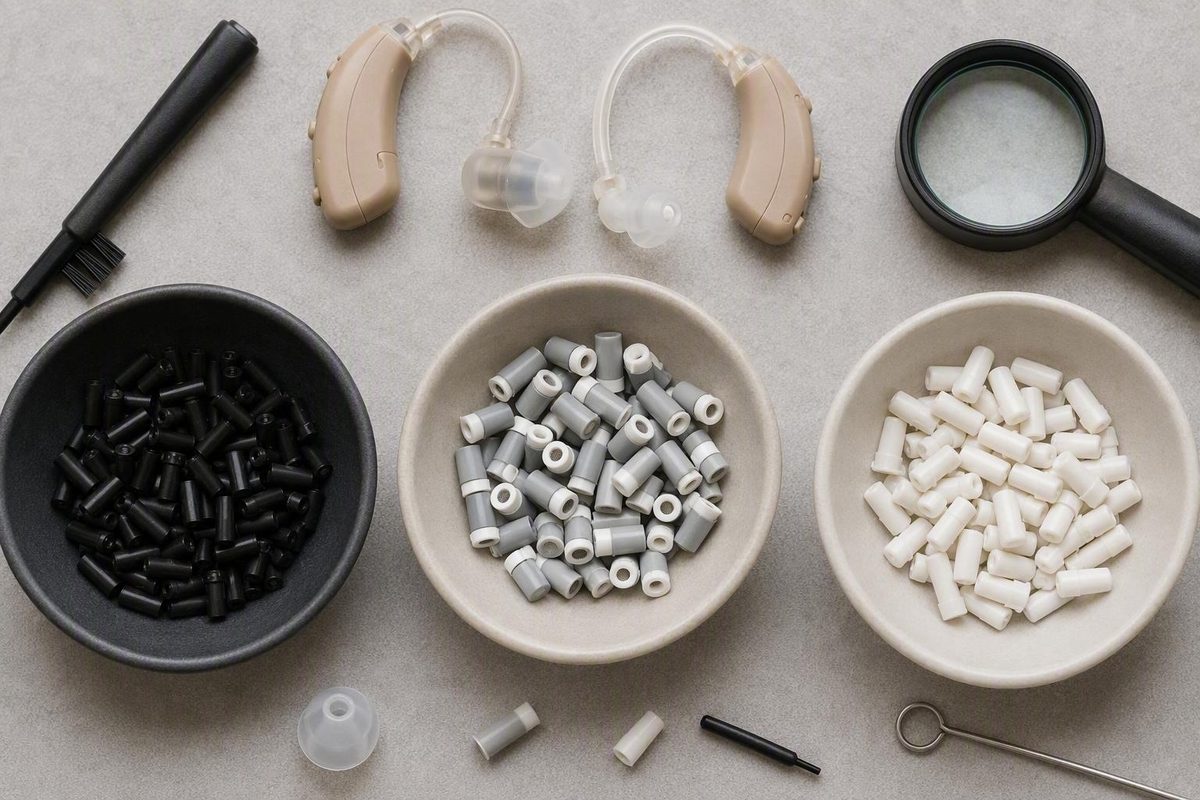
Hearing aid wax filters are inexpensive, but choosing one is not simply a matter of matching the brand name on the package. The exact hearing-aid model, receiver generation, dome or custom mold, installed filter system, and part number can all affect compatibility.
Treat the purchase as a compatibility task before comparing prices. Identify the existing system, verify it against model-specific instructions, and buy only a confirmed match. During replacement, follow the instructions for that device and stop if the old filter will not release or the new one requires force.
What wax filters protect—and where to find them
A wax filter, wax guard, or wax trap is a small barrier positioned at a hearing aid’s receiver or sound outlet. The names are commonly used interchangeably, although manufacturers may use a particular term for a specific product family.
Its limited purpose is to help keep earwax and fine debris away from internal acoustic components. Some systems are also marketed as barriers against moisture. Earwax is normal, but accumulation around the sound outlet can obstruct sound transmission or interfere with operation.
The location depends on the hearing-aid design:
- RIC or RITE hearing aid: The receiver sits in the ear canal at the end of a thin wire. A removable silicone dome often covers the receiver, with the filter beneath the dome at the receiver opening.
- RIC or RITE with a custom mold: The filter may be in the receiver or mold assembly. Access and replacement can differ from a standard dome.
- ITE, ITC, or CIC hearing aid: The receiver and filter are commonly contained within the hearing-aid body. Look near the sound outlet—the portion directed into the ear canal.
- Other BTE configurations: The filter may be in a speaker, earmold, or another outlet component rather than directly visible on the hearing-aid case.
The typical RIC arrangement places the filter beneath the removable dome and above the receiver, while in-ear designs commonly place it near the sound outlet or within the hearing-aid body (Miracle-Ear’s guide to hearing-aid filters).
A simplified diagram looks like this:
Typical RIC/RITE arrangement              Typical in-ear arrangement

Hearing-aid body                           Hearing-aid shell
      │                                           │
Receiver wire                              Internal receiver
      │                                           │
Removable dome                              Sound outlet
      │                                           │
Wax guard at receiver opening              Wax guard near outlet
      │                                           │
Ear canal                                   Ear canal
These are typical locations, not universal ones.
Do not pry at an outlet merely because no obvious guard is visible. Check the user manual, original accessory package, manufacturer support page, or instructions supplied by the hearing-care provider.
When to inspect or replace a wax filter
Inspect the wax filter when you notice:
- Visible wax or debris covering the filter
- Sound that has become muffled or unusually weak
- Distortion or inconsistent output
- Little or no sound from one hearing aid
- A difference between the left and right devices
- Wax accumulating repeatedly around the dome or sound outlet
These signs justify an inspection; they do not prove that the filter caused the problem.
Why there is no universal replacement interval
Published schedules vary considerably:
- Beltone recommends changing the guards covered by its product instructions once a month (Beltone wax-guard instructions).
- Jabra Enhance recommends monthly replacement—or sooner if the covered hearing aids do not sound as expected (Jabra Enhance replacement guidance).
- A general retailer guide suggests replacement every three to four weeks, adjusted for wax production and use.
- HearUSA recommends weekly inspection and replacement at approximately three months, or sooner when symptoms or visible debris call for it.
- HearingTracker Shop recommends daily inspection and roughly two-month replacement for Phonak SmartGuard, while acknowledging substantial individual variation.
These recommendations cover different products and come from a mix of manufacturers, hearing-care providers, and retailers. They should not be averaged into one supposedly correct schedule.
A more useful framework is:
- Inspect regularly. A weekly visual check can be incorporated into routine exterior or dome cleaning.
- Follow product-specific guidance. Use the interval stated for the exact hearing aid and filter system.
- Replace a visibly blocked disposable filter. Do not wait for a calendar reminder when the outlet is already obstructed.
- Investigate sound changes promptly. Check the battery or charge, dome, filter, and exterior openings before assuming the receiver has failed.
- Adjust based on experience. Heavier wax production, frequent hearing-aid use, humid conditions, and dusty environments may shorten the practical interval.
Track the left and right devices separately. A simple calendar note for each side can reveal a useful pattern without wasting filters.
The compatibility checklist to complete before buying
Brand alone does not establish compatibility. A manufacturer may use several filter families across different hearing-aid models, receiver generations, custom molds, and technology platforms.
Use this checklist before ordering.
1. Record the exact hearing-aid model
Look at the hearing-aid case, companion app, purchase paperwork, fitting report, or clinic records. Record the full model designation rather than only “Phonak,” “Oticon,” or “Signia.”
Include suffixes and style labels such as RIC, RITE, miniRITE, ITE, ITC, or CIC. A product-family name may include several physical configurations.
2. Identify the receiver or wire generation
The receiver may have a printed or molded designation near its connection point. Record any number, letter, strength, or generation marking.
This matters because the receiver opening or guard system can change between generations even when the hearing-aid family name remains familiar. Retail listings, for example, distinguish Signia MiniReceiver 2.0 guards from products for 3.0 receiver and tubing systems.
3. Note whether the device uses a dome or custom mold
A standard removable dome may expose the filter directly after removal.
4. Identify the current filter family and part number
Check:
- The original filter package
- A label on the dispenser
- The hearing-aid manual
- The clinic’s invoice or supply record
- A manufacturer accessory list
- A part or reference number printed on the package
5. Compare the applicator or dispenser
Record whether the current filters come as:
- Individual two-ended sticks
- A rotating disc or wheel
- Push-on guards
- Filters in a blister or shell
- A proprietary tool for a custom mold
A matching dispenser format is a helpful clue, not final proof.
6. Confirm the result through an authoritative channel
Check the exact model’s manual or manufacturer support documentation. If the answer remains unclear, contact the manufacturer or the hearing-care professional who fitted the devices.
When contacting support, provide clear photographs of:
- The hearing-aid label
- Receiver or wire markings
- Dome and receiver tip
- Installed guard
- Old dispenser or package
- Any visible part number
Photographs may reduce ambiguity, but visual inspection alone still may not identify every system. Amplifon advises checking the manual, manufacturer, or a hearing-care professional because wax guards vary by model and are not universally interchangeable (Amplifon’s compatibility guidance).
The Phonak Paradise example: why configuration matters
Cerustop and CeruShield illustrate the danger of relying on a broad model-family name. On a Hearing Group Cerustop page, a customer reported that the filters did not fit a Phonak Paradise device; the store manager replied that the customer’s Paradise required CeruShield (Hearing Group’s Cerustop listing and fit discussion).
By contrast, another retailer associates selected Phonak Paradise Receiver 5.0 systems with Cerustop. They do not establish that every Paradise hearing aid uses either filter universally.
Treat retailer compatibility tables as leads, not final confirmation. Manufacturer documentation or a provider’s model-specific identification should override a generalized seller table.
If a replacement does not seat using the normal pressure described in the model instructions, stop. Never force, trim, alter, or substitute a merely similar-looking guard.
Common filter systems—and why the names are not interchangeable
The following is a product-family orientation, not a definitive model-by-model compatibility chart. Availability and associations can change, and a listed brand relationship does not mean that the filter fits every hearing aid from that brand.
Retail catalogs list Oticon NoWax, ProWax, and ProWax MiniFit; Phonak Cerustop and CeruShield; Signia NanoCare products; Starkey Hear Clear; Widex NanoCare; and ReSound guards. These are retailer-reported associations unless model-specific manufacturer documentation says otherwise (Hearwell Services’ filter catalog).
| Filter family | Commonly listed association | Evidence status | What to verify |
|---|---|---|---|
| NoWax | Oticon | Retailer-reported | Exact model, receiver, and original filter |
| ProWax | Oticon | Retailer-reported | Whether the hearing aid or mold specifies ProWax |
| ProWax MiniFit | Oticon | Retailer-reported | MiniFit receiver or model designation |
| Cerustop | Phonak, Unitron, and selected other configurations | Retailer-reported; disputed or configuration-dependent for some products | Receiver generation, mold, and part number |
| CeruShield | Phonak | Retailer-reported; configuration-dependent | Whether the device uses the disc system |
| SmartGuard | Phonak | Retailer-reported | Exact receiver and product instructions |
| NanoCare | Widex and some Signia listings | Retailer-reported | Brand-specific package and exact model |
| NanoCare 3.0 | Signia | Retailer-reported | 3.0 receiver or tubing designation |
| Quick Guard | Signia/Connexx | Retailer-reported | Selected-device compatibility |
| MiniReceiver guards | Signia | Retailer-reported | Whether the receiver is 2.0 or 3.0 |
| Hear Clear | Starkey | Retailer-reported | Hearing-aid model and receiver |
| ReSound wax guards | ReSound | Retailer-reported; exact fit unknown without model confirmation | Standard versus specialized receiver configuration |
| Beltone wax guards | Beltone | Manufacturer retail guidance; model scope not stated | Exact covered model and original package |
Oticon’s appearance beside three differently named systems is itself a warning: “for Oticon” is not a complete compatibility specification.
Signia listings provide another example. Separate retail products are identified for MiniReceiver 2.0 and for NanoCare 3.0 systems associated with Mini Receiver 3.0 or Thin Tubes 3.0. Receiver generation is therefore a purchase detail, not a minor technicality.
Cerustop versus CeruShield
The names describe different supply and application systems in the reviewed retail listings:
- Cerustop is described as a disposable push-on guard, commonly sold as eight filters on individual applicators.
- CeruShield is described as a disc-based system containing eight filters and a slot for depositing used filters.
Those packaging differences can help identify the systems, but they do not establish compatibility by themselves. A hearing aid that accepts one should not be assumed to accept the other.
Retail listings also conflict over which Phonak receivers or Paradise configurations use Cerustop or CeruShield. Resolve that uncertainty using the model, receiver, existing system, and manufacturer or provider guidance—not by choosing the package that looks familiar.
Broad third-party compatibility claims
One marketplace kit claims compatibility with most selected CIC, ITC, ITE, and RIC hearing aids from Phonak, Unitron, and Widex, plus some ReSound, Beltone, and Oticon devices. The listing expressly excludes Signia and Starkey but does not provide an exact model list.
That is a marketplace claim, not independent verification. Without model and receiver details, it is insufficient to establish fit. Ratings, review counts, and sales figures also do not prove dimensional compatibility, safety, or technical quality.
How to compare pack size, price, and real value
Once compatibility has been confirmed, compare products in this order:
- Verified fit for the exact hearing aid and receiver
- Correct filter family and part number
- Number of usable filters
- Applicator or dispenser format
- Seller identity and product traceability
- Return terms for unopened or incompatible supplies
- Cost per usable filter
A cheaper guard has no practical value if it cannot be verified for the receiver, does not remain seated, or requires force. A large bundle is not automatically better either. The available evidence does not establish universal storage conditions or shelf-life limits, so buy a quantity you can reasonably identify, store, and use.
Standard retail packages in the reviewed listings commonly contain six or eight filters, while selected multipacks contain 18 filters. Jabra Enhance also lists a 48-filter bundle for its covered products (Jabra Enhance’s Wax Guard Bundle).
Example price snapshot
Prices, stock, package configurations, seller terms, and compatibility statements can change. Cost per filter is rounded to the nearest cent.
| Example listing | Captured package price | Filter count | Approximate cost per filter | Important limitation |
|---|---|---|---|---|
| Oticon ProWax MiniFit | $10.99 | 6 | $1.83 | Verify the exact Oticon receiver and system |
| Widex NanoCare | $9.99 | 8 | $1.25 | Listed only for selected Widex devices |
| Signia NanoCare 3.0 | $9.99 | 8 | $1.25 | Confirm a compatible 3.0 system |
| Cerustop | $7.99 | 8 | $1.00 | Confirm receiver, mold, and part number |
| Connexx Quick Guard | $7.99 | 8 | $1.00 | Listed only for selected Signia and Connexx devices |
| Starkey Hear Clear | $7.99 | 8 | $1.00 | Verify the exact Starkey model and receiver |
| Oticon ProWax MiniFit three-pack | $26.99 | 18 | $1.50 | Multipack value depends on confirmed fit |
Those specialty-retailer prices and quantities were captured from separate product listings sharing the stated prices; they should not be read as evidence that the products are interchangeable (Hearing Aid Accessory’s product and price listings).
A separate Anico marketplace kit was listed at $9.49 for 24 filters, or approximately $0.40 per filter. Its seller makes broad compatibility claims but omits exact supported models, so the low calculated unit cost does not establish usable value for a particular hearing aid (Amazon’s Anico kit listing).
Use this calculation only when comparing equivalent, confirmed products:
Cost per usable filter = package price ÷ number of compatible filters
“Usable” is the critical word. If only one product has a verified part number for the receiver, it is the only meaningful candidate—regardless of how inexpensive another package appears.
Check whether a listing is for one pack, a multipack, a mixed cleaning kit, or replacement filters alone. Brushes, cloths, and other accessories can make package prices look less comparable even though they do not change filter compatibility.
How to replace a wax filter with a two-ended tool
This generic method applies only to the common disposable applicator with one end for removing the old filter and the other carrying a new one. Disc dispensers, push-on mechanisms, custom molds, and proprietary systems may require different steps.
The instructions for the exact hearing-aid model always override this sequence. Attempt the task only if you are comfortable handling very small components, have previously been shown how, or received the correct replacement parts from your hearing-care provider.
Before beginning
Prepare:
- Clean, dry hands
- A well-lit, uncluttered work surface
- The verified replacement filter
- The device-specific instructions
Power off the hearing aid if its instructions call for that step. Work on one hearing aid at a time so that left and right components do not become mixed.
Step 1: Expose the filter as directed
For many RIC or RITE designs, the dome must be removed before the receiver opening can be reached. Remove it only as the manufacturer directs, and do not remove a dome or custom mold when the instructions do not call for it.
Other hearing aids provide direct access to the filter at the sound outlet.
Step 2: Identify the removal end
A typical two-ended tool has:
- An empty pin, hook, or removal tip on one end
- A fresh filter preloaded on the other end
Confirm which side is which before touching the receiver. This prevents wasting the new filter or attempting the steps in the wrong order.
Step 3: Remove the old filter straight out
Insert the empty or removal end straight into the used guard, then pull the tool straight away from the receiver rather than twisting or withdrawing it at an angle. Jabra Enhance and HearUSA both describe straight insertion and withdrawal for the covered two-ended systems (Jabra Enhance replacement guidance).
If the guard does not release using the instructed method, stop rather than increasing force.
Step 4: Install the new filter
Reverse the tool so the fresh guard faces the receiver opening. Align it straight with the opening, insert it as directed, and withdraw the applicator straight out. The new guard should remain in the receiver.
Oticon describes the same basic two-pin sequence: the empty pin removes the old filter, the opposite pin installs the new one, and the tool is then discarded (Oticon’s wax-filter replacement instructions).
Step 5: Inspect the result
Confirm that the guard remains securely in place and is not visibly angled or protruding. Do not continue pushing after unexpected resistance. If the filter will not fit using the normal model-specific method, remove the hearing aid from service and ask a hearing-care professional to confirm the part.
Step 6: Finish the reassembly
Discard the used filter and single-use applicator. Clean the dome according to its instructions or install a replacement dome if needed, then reattach it as directed.
Power the hearing aid on and test it at a comfortable setting. If sound remains weak or absent, continue with broader troubleshooting rather than repeatedly replacing new filters.
Troubleshooting weak or missing sound
A clogged guard can accompany muffled, weak, distorted, or absent sound, but those symptoms have multiple possible causes. Use a cautious sequence that starts with routine checks and ends with professional assessment.
1. Verify the power source
For a rechargeable device, confirm that it charged correctly and that the charging contacts are clean as directed. For a disposable-battery model, verify orientation and try a known fresh battery if appropriate.
Make sure the hearing aid is switched on and not muted through a button, app, or accessory.
2. Inspect the dome or earpiece
Look for visible wax or debris around the dome and its sound openings. Clean or replace the dome only according to the model instructions.
Confirm that the dome is reattached as directed before placing the hearing aid back in the ear.
3. Inspect the wax filter
If the filter is visibly blocked, replace it with the confirmed part. Disposable guards should be replaced rather than pierced, washed, or altered.
If the filter appears clear but product-specific guidance calls for replacement and the sound has changed, installing a verified replacement may still be a reasonable maintenance step.
4. Check for external moisture and debris
Look for visible moisture or debris on the exterior, receiver opening, or battery compartment. Follow the manufacturer’s drying and cleaning instructions. Do not insert improvised objects into microphone ports or the receiver.
5. Test the hearing aid again
After reassembly, test the device in a quiet setting. Compare it with its usual sound rather than immediately increasing the volume to compensate.
If the correct new filter and basic cleaning do not restore sound, the cause could involve:
- The receiver
- A microphone opening
- Moisture inside the device
- A damaged wire or connection
- Programming or settings
- The battery or charging system
- Another internal fault
Stop if the old filter will not release, the new filter will not remain seated, or either step requires force.
Routine filter maintenance is not the same as receiver replacement, fitting, programming, or calibration. Do not independently install a different or more powerful receiver. A receiver must match the hearing aid and prescribed fitting, and selected configurations may require professional tools or calibration (Hears Hearing & Hearables’ receiver guide).
Once a confirmed fresh guard, clean dome, and working power source fail to help, arrange professional troubleshooting instead of repeatedly replacing parts.
When to stop and contact a hearing-care professional
Contact a hearing-care professional when:
- You cannot confirm the filter from the model, receiver, manual, or original package.
- Two credible compatibility sources give conflicting answers.
- The existing filter cannot be removed using the normal method.
- A new filter does not fit, remain seated, or sit correctly.
- Replacement requires unusual pressure.
- Sound remains weak, distorted, intermittent, or absent after basic maintenance.
- The receiver wire, mold, microphone, or hearing-aid shell appears damaged.
- Receiver replacement, programming, calibration, or a prescription change may be needed.
- A filter or other component becomes lodged in the ear canal.
A guard lodged in the ear should be removed professionally. Do not attempt retrieval with tweezers, cotton swabs, or improvised tools (Amplifon’s wax-guard safety guidance).
Clinic care can also provide a maintenance baseline. HearUSA suggests thorough clinic cleaning every three to six months, potentially including dome and filter replacement, as general guidance rather than a requirement for every user or device (HearUSA’s clinic-cleaning guidance).
Use this final safety checklist:
- Verify the exact part, not only the brand.
- Follow the model-specific instructions.
- Insert and withdraw the tool straight when that is the stated method.
- Never force, modify, or substitute a component.
- Stop when fit or removal is uncertain.
- Seek professional help for persistent sound problems or receiver work.
The compatibility-first action plan is simple: identify the exact hearing-aid model and receiver, confirm the installed filter family and part number, purchase only a verified match, and follow the device-specific replacement procedure. A fresh filter may restore sound affected by blockage, but unresolved weak or missing sound, uncertain fit, a stuck guard, or receiver-related work belongs with a hearing-care professional.
Frequently asked questions
Are wax filters, wax guards, and wax traps the same thing?
Usually, yes. The terms commonly describe the small barrier at a hearing aid’s receiver or sound outlet that helps keep earwax and debris away from internal acoustic parts.
Manufacturers and sellers may prefer one term for a particular product family, so matching terminology does not make two products interchangeable. “Wax guard” is a component category; names such as ProWax, Cerustop, and NanoCare identify specific systems.
How often should hearing-aid wax filters be replaced?
There is no universal interval. Recommendations in the reviewed guidance range from roughly monthly to approximately every two or three months, depending on the product, source, wax accumulation, use, and environment.
Follow the instructions for the exact hearing aid and filter. Inspect regularly, replace a disposable guard when visibly blocked or when product guidance calls for it, and investigate sooner when sound changes.
Can a hearing-aid wax filter be cleaned and reused?
Disposable wax guards generally should be replaced rather than cleaned and reused.
Clean the dome and exterior only as directed, then install a new verified filter with the proper tool. If the device uses a nonstandard or provider-serviced system, ask the provider how it should be maintained.
Can I use any wax guard made for my hearing-aid brand?
No. One brand may use several incompatible filter families across different models, receivers, molds, and generations.
Confirm the complete model, receiver designation, current filter family, and part number. Use the original package, manual, manufacturer guidance, or provider records when available. Do not rely only on color, shape, a broad retailer table, or a package claiming to fit “most” devices from the brand.
What should I do if a wax guard gets stuck in my ear?
Leave it alone and arrange professional removal. Do not use tweezers, cotton swabs, pins, or other improvised tools.
Bring the hearing aid and filter package, if available, so the professional can identify the component.